Help & Getting Started
Learn how to upload your DFA files, run an analysis, and download your documentation.
Where to find your DFA files
Before uploading, you need to export your project from Papyrus Designer. Here's how:
Open your template in Papyrus Designer and format the document.
Use Tools > Format Document (or Ctrl+F) to ensure all external includes are loaded into memory.
Export the project.
Go to File > Export Project… — Papyrus Designer will generate a .zip archive containing all project files.
Extract the ZIP and open the docdef/ folder.
This folder contains the files to upload: the main .dfa file and all the .inc dependency files.
export.zip
├── afpds/
├── docdef/                     ← Folder to use
│   ├── TEMPLATE_MAIN.DFA       ← Main file to upload
│   ├── MODULE_COMMON.INC
│   ├── MODULE_LAYOUT.INC
│   ├── MODULE_FORMATTING.INC
│   └── … (other .INC files)
├── fdf_pdf/
├── fonts240/
├── fontsoln/
├── imported/
├── jpeg/
└── userisis/
Upload your DFA file
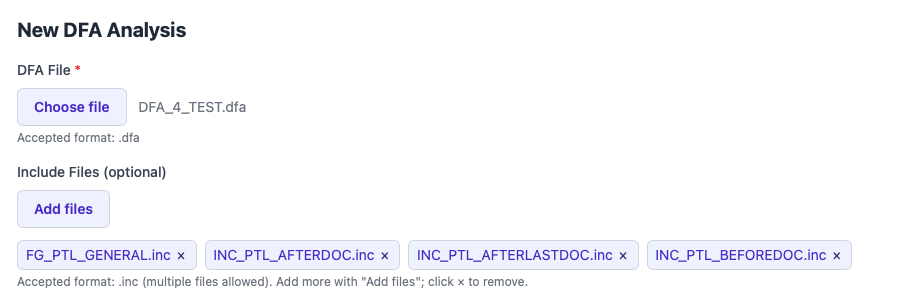
The files to upload come from the docdef/ folder of your exported project (see above).
-
1
Click "Choose file" and select your
.dfafile.Only one main DFA file can be selected at a time.
-
2
Optionally, click "Add files" to include
.incdependency files.Include files are used when your DFA code references external modules.
-
3
Your selected files appear as tags below the button.
Click × on a tag to remove an individual file.
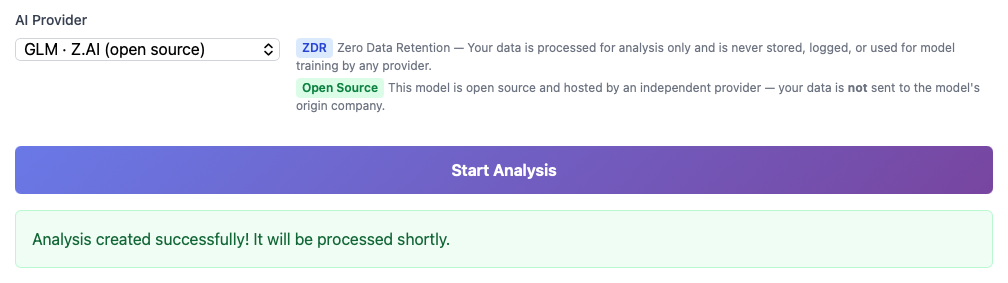
Start your analysis
-
4
Choose an AI Provider from the dropdown.
Available options include OpenAI, Anthropic, Google, Mistral, and others. All providers deliver equivalent documentation quality — pick the one your organization prefers or leave the default.
-
5
Click "Start Analysis" to submit your file.
Each analysis costs 1 credit. Your remaining credit count is shown in the top-right corner of the page.
-
6
A confirmation message confirms your analysis has been queued.
The analysis will appear immediately in the My Analyses table below.
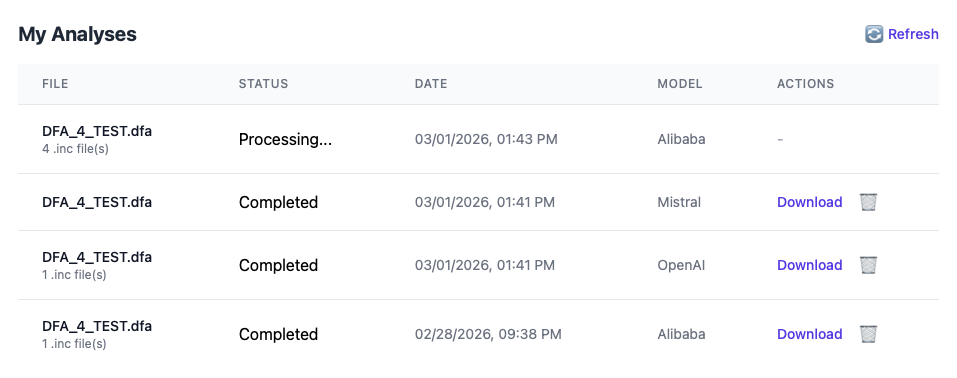
Track your analysis
-
7
Your analysis appears in the My Analyses table.
Status badges indicate the current state:
Pending queued, waiting to startProcessing analysis in progressCompleted done — results ready to downloadFailed an error occurred — contact us if it persistsThe table refreshes automatically every 30 seconds. You can also click 🔄 Refresh to update it manually.
Download your results
-
8
When the status shows Completed, click Download.
You will receive a ZIP archive containing your analysis report in HTML and Word formats.
Credits & Promo codes
Each analysis costs 1 credit. Your current balance is displayed in the top-right corner of the dashboard.
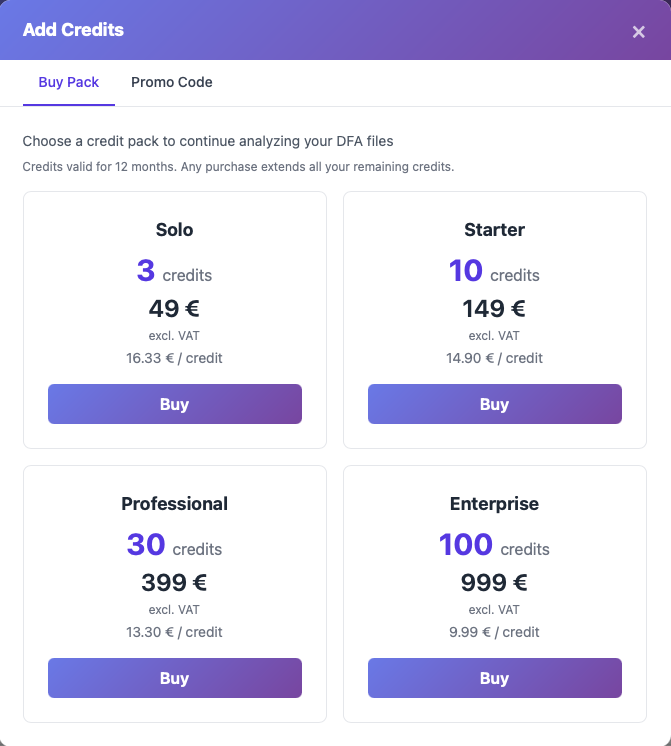
Buying credits
- Click the "Add Credits" button in the top-right corner of the dashboard.
- The modal opens on the "Buy Pack" tab, showing available credit packs in a two-column grid. Select your preferred pack and follow the payment process.
Credits are valid for 12 months from the date of purchase.
Using a promo code
- Click "Add Credits" in the top-right corner of the dashboard.
- Select the "Promo Code" tab in the modal.
- Enter your code — it is automatically converted to uppercase — then click Apply. Credits are added to your account instantly.
Need more credits or have questions? Contact us to discuss plans and pricing.
Need help?
Can't find an answer here? Our team is happy to assist.